Sunday 13 December 2015

Benefit Gimme Brows!

Brows can really make or break a look, so making sure they are on point is really important. My normal 'go to' product for brows is Anastasia Beverly Hills Dipbrow Pomade. As much as love this product, it is a long process and can take between 10-15 mins to do my brows alone. 

On those odd occasions where I don't want to spend so much time on my brows (normally a Sunday or a day when I'm doing audits at work) I still like to do my brows in a little to give them shape and also to fill in any patchy bits. 


Benefit Gimme Brow is the perfect solution for lazy days! It's quick and easy, making it perfect for lazy days! 

Gimme Brow also won Allure The Best Of Beauty Award in 2013. I can't believe it took me so long to find this product!? Has it really been out that long!

Below you can see a before and after using Gimme Brow. You can see the shape is more defined and my brow looks fuller. 


Brush 

The brush is tiny so is perfect for any brow size. When I first opened the product, I though it was going to be too small vs my normal brow brush, but in fact it was just the right size. Because you are building up the product over a few applications, the smaller brush makes it easier to fill in patchy bits. 


Colours 

This product comes in two different colours, Light/Medium and Medium/Deep. I went for Medium/Deep given that I have pretty dark hair. 


               (Source : benefit.co.uk)

Price : £18.50 per tube. Given how easy it makes my mornings, so worth every penny. 


Final words
If your looking for a quick and easy solution to doing your brows then this is the product for you. If your a woman (or man) who wants to look and feel great but are busy busy busy, then Gimme Brow will fit into your morning routine (and yor handbag) with ease. 

DLJ
Xoxo 

Sunday 22 November 2015

The Game Changer : Caudalie Overnight Detox Oil

As you may have guessed from the title, I feel quite strongly about the Caudalie Polyphenols Overnight Detox Oil 30ml already. I had a free sample either from a birchbox or from another make up purchase and for some reason wasn't really fussed on trying it.

But my skin has been SO dry from being in and out of heated buildings and the cold weather that I was in desperate need of a skin fix. I found this while sorting through my pile of samples, and thought why not?

(Source : http://uk.caudalie.com/)


For application, you warm 6 drops in your hands then apply to clean skin before bed and leave overnight to do all the hard work! Below is how Caudalie recommend you apply the oil to your face. It sounds so simple, but I really love it when companies do little pictorials of how to apply their products. It's really nice to be able to see exactly how they intend for the product to be applied.

(Source : http://uk.caudalie.com/)


This oil is classed as a 'dry oil' so it doesn't leave your skin feeling greasy at all, it makes it feel like you have just added moisturiser. Ideal given that no one wants to go to sleep with a greasy face!

The formula is 100% plant based and 'promotes cellular renewal and toxin elimination',  so you know it's good for your skin. As well as making your skin feel soft, the oil plumps your skin to instantly make you look younger. The oil also doesn't have an overwhelming smell, which is great given the fact that you have to sleep with it on.

The sample size I had lasted around 5 nights and I was so shocked at how much of a difference it made. The day after I ran out, I got straight on line and ordered a bottle.

My skin felt so soft, all of my dry patches disappeared and my skin just looks so even. My skin also appeared much fuller and healthier. I couldn't believe how good my skin looked in just a few applications.

But I thought, well this is all surely going to be too good to be true. I was sure that it was going to be really expensive given the amazing effect it had had on my skin. But to my amazement, a 30ml bottle is just £29.00 on the Caudalie website. And at the moment, you can get 10% off your first order! What a bargain!

I cannot wait for my full size bottle to arrive this week!


DLJ
Xoxo

Sunday 15 November 2015

Rimmel Scandleyes Liner

I was in Superdrug a few months ago and I noticed this Gel Liner was on special. I was looking for a cheap and cheerful everyday liner that was inexpensive, but did the job. This liner seemed to tick all of the boxes at just £4.99 on deal. And as an added perk, you also get a free application brush!

                            
(Source : http://www.lookfantastic.com)
             

The Rimmel London Gel Liner  promises '24 hours of rich, intense colour that doesn't flake, smudge or run'. So rather than just put it to the test like most normal people, i.e. wear it all day or maybe wear it out clubbing, I thought I'd wear if for an hours long netball session!

What better way to test an eye liner than to run around and get all sweaty? And I have to say, I was really very impressed with how durable this liner is! It did smudge a little tiny bit, but hey what can you expect? I was a sweaty mess and had been 'wiping my brow' a fair few times during the training session (something that I don't think you would normally do during a normal working day, unless you are a professional sports person at least!)

But anyway moving anyway from 'perspiring' and moving on to the liner itself....the formula is really think and creamy and gives a good, strong black line. I hate it when you buy a black liner and it is a dull grey or off-black colour.

(Source : http://www.lookfantastic.com)


So luckily for me, this Rimmel liner exceed my expectations in pigment and in durability. Not too shabby so far right? Let's move on to application. Because this liner is so rich and creamy, it glides on and is super smooth allowing you to get a really sharp line. The little application brush that comes with the liner is also so good! I actually use this as my main liner brush alongside my other gel liners. Even if this gel liner wasn't good, I would actually buy it again just for the brush! I don't actually know any other liner brushes that are that good for such a bargain price!

(Source : http://www.lookfantastic.com)


I would 100% recommend this liner to anyone and everyone and will definitely be purchasing this again. I think the best thing about this liner has to be the price. Because it's so cheap, it means it's really accessible to pretty much every budget and especially people who are starting out with their make-up collection.

DLJ
Xoxo


Sunday 1 November 2015

REN Flash Rinse 1 Minute Facial

When I received this sample, I was intrigued by the fact that it claimed to be a 1 minute mask. I love a good face mask, but sometimes I just do not have time to sit and wait for a face mask to dry. 

Everyone always seems to be super busy these days, so the prospect of a quick face mask is great. The REN Flash Rinse 1 Minute Facial 'instantly revitalise and rejuvenate the skin so you can boast a radiant and glowing complexion'. Can you really get all of this in just ONE minute?


To activate the vitamin C, you rub this formula into your skin in circular motions then add a small amount of warm water and re massage into your skin. Simply leave for one minute and then rinse off! And it's as simple as that! The instructions recommend that you use this every 3 days or so to maintain the effects.

Because this mask is infused with vitamin C, it smells divine. The mask is quite thick but as you apply it, it seems to melt into the skin. It has a slight grainy texture to it which aids with making your skin smooth.


The after affect? 

I didn't substitute anything in my normal skin routine for this product. Because it only takes a minute every 3 or 4 days, it was easy enough to introduce it to my normal skin regime, which is a real plus. 

More importantly, the effect on my skin has been amazing. Straight away, my skin looks fresh and has a real glow to it. It feels silky smooth and the effects last a few days, which is why, it appears to recommend a top up every 3 days on the packaging. As been as the treatment is only 1 minute long, I think that is pretty good going. 


Price

You can pick up a 75ml bottle of this from Amazon for just £28...REN Flash Rinse 1 Minute Facial 75ml

I'll definitely be picking up one of these...or dropping some hints to Santa ;)

DLJ
Xoxo 

Sunday 25 October 2015

Anastasia Cream Contour Kit : Fair

I had been thinking about purchasing this kit for a little while, but my make up artist for my wedding mentioned that she thought that the 'light' palette would be too dark for me, so I decided to hold of buying.

Then, a month or so ago, Anastasia released her newest Contour Cream Kit in Fair. As soon as I saw it,  I knew these colours would be so much better suited to my pale complexion. Like the other 3 palettes on the market, the Fair kit has 6 shades of contouring and highlighting creams. 


The top row has the 3 lighter shades which are : Soft Light, Lustre and Fair which will be our highlight colours and the bottom row has our 3 dark shades for contouring which are Fawn, Shadow and Mink. 

I was a little apprehensive about buying this kit at first because I had read some beauty reviews saying that the Anastasia Beverly Hills Contour Cream Kit's were more for advanced users. As a beginner, I was a little worried that I would spend a lot of money and be disappointed. In the UK, you can pick this set up from Amazon for £49.99 (Anastasia Beverly Hills Contour Cream Kit (Fair) NEW 2015) each and I believe they are $40 in the states. 


The colours 


Soft Light

Lustre


Fair


Fawn


Shadow


Mink


First thoughts

The first time I used this palette, I thought 'oh my god, the reviews were right, this is not for beginners'. I found that the formula was a little bit more 'dry' to apply than I originally anticipated and I wasn't able to get the look I wanted. However, given the price tag, I wasn't going to give up on my goal of using this product and having amazing cheek bones ;)

So, I tried again. This time, I was more prepared for the formula and I didn't feel like I was out of my depth. I used a mix of Mink and Shadow for my contour and Soft Light and Fair for my highlight.


For application of my highlight I used the Real Techniques Essential Foundation Brush (which is part of their core collection)  and for the contour I used the Real Techniques Pointed Foundation Brush

I then used a Beauty Blender to blend everything in. It's important to make sure you 'dab' instead of rub as you don't want the dark bits where the light bits should be and visa versa!

As you can see, I have a pretty large forehead and jaw line, so I wanted to and make these look smaller than they actually are.

The finished result?


Some people like to apply a thin layer of foundation either before or after the Anastasia Beverly Hills Contour Cream Kit, but I decided instead to just use Benefit's Hoola and Dandelion to set the cream kit.

Final Thoughts?

This is the first cream contour kit that I have ever used, so I am not in a position to compare it to others. This kit can be a little tricky to master at first, but what new product isn't? I remember the first time I tried Gel Eye Liner and thinking, 'nope not for me'! But would I live without my Gel Eye Liner now? Hell no! A little practise makes perfect and I am still far from perfect, but I think I'll get there.

Manny recommends using a little bit of Tarte Maracuja Oil to make these a little bit more creamy and 'blend-able'  in this video (https://youtu.be/ZAqQjJanxNY). The oil that he recommends is pricey even by my standards. I've never heard of it before this video, so it may be worth it's weight in gold, so I need to do my research here. But if it works and price is not an issue, then maybe give this a go if you are finding the formula a little dry.

Would I buy this again? So far, I have only used this product four times and each time I am finding it easier and easier to use. I'm pretty sure that by the time I run out (which will be a little while off I'm sure) I will be more than happy with this kit and will buy it again. Even based on my limited experience with the palette, I would recommend it to other people.

The colours are perfect for my skin tone, they look amazing (after a few practise sessions) and you do get quite a lot of product for your money.

DLJ
Xoxo


Sunday 18 October 2015

Benefit : They're Real vs Roller Lash

The only way you could possibly not know about Benefit's new Roller Lash mascara would be if you had been living under a rock for the past few months!

Their new lash loving mascara previewed in January's Elle magazine, and if Instrgram is anything to go by, it’s been a pretty successful start!

 According to their website:
Curl Power!
97% said it visibly lifts lashes* 
87% said it gives long-lasting curl* 
94% said eyes look more wide open* 
*consumer panel survey on 31 women after 4 weeks
(https://www.benefitcosmetics.co.uk/product/view/roller-lash)

Which isn't bad going by anyone’s standards. I have had a bit of a love / hate relationship with Benefit Mascara. I first used their BadGal mascara what feels like a decade ago and was so disappointed. Then came along ‘They’re Real’ and oh my! What a game changer. It had to be my favourite mascara on the market.


So it is fair to say I was a little dubious when they launched their new ‘Roller Lash’ mascara. How could anything be BETTER than They’re Real? Was it possible to actually create a mascara and could give you even more volume and oh la la?

Clinging to my copy of Elle Magazine in the shop, I wondered if I should just let this new mascara pass me by and not ruin the wonderfulness that is They’re Real. And after the flop of the They’re Real Eye Liner, I couldn’t cope with anymore heartbreak from Benefit. But alas, I had to have it.


And boy am I glad I did! As you can see from my photo, Roller Lash makes your lashes even more beautiful. The incredible new brush clings to your lashes making sure to coat every last little tinie tiny bit. 


What a beauty to behold. As you can see from my photo comparing They’re Real and Roller Lash, it’s like the new formula adds that bit more oomph compared to They’re Real.


But let’s take it back a step. Was They’re Real ever a ‘bad’ mascara? Of course not! And would I still happily buy it? YES! So what does that mean for my lashes going forward? Well, it simply means I’ll just have to have both!


DLJ
Xoxo

Eyeko Fat Liquid Liner : Black

The Eyeko Fat Liquid Eyeliner in Black was a full size feature in this months BirchBoxUK. Being a lover of gel liner I was intrigued to see if this eyeliner would convert me back to liquids over gels.


This liner claims to offer 'big and bold dramatic eyes' in an 'easy to hold chubby pen'. So lets get down to it…

The application of this product takes a little getting used to. If, like me, you have been using gel liners with a thin application brush, the 'chubby' style of this liner takes a few attempts to get right. Although, once you have tried 2 or 3 times, I managed to pick up the application style. As you can see below, the tip of the liner looks like a felt tip pen so this is why it takes some practise.


I do admit, that I still find it a little difficult to get a perfect cat eye unless its rather thick. But that is all down to person preference. As you can see, you can create quite a few different effects with the tip of the liner.


Once I managed to get my liner on and looking pretty much how I wanted to it, it was time to test the durability. Here is where I find this product falls down a little bit. My normal working day is around 8/9 hours and much of this I am coming in and out of buildings, which means I am faced with lots of different temperatures and seasons!

I found that this liner didn't hold up quite as well as my normal gel during the working day. However, when I wore it at the weekend, when I was doing less, I did get a longer lasting effect.

Saying that though, the colour is very pigmented. My issue was with smudging rather than the colour fading.

Price

On their website, it RRP is £12 (however I think you can find it a little cheaper on Amazon at the moment, link at the top of the page).

Do I think this is worth £12? I like the fact that you can easily create thicker lines without having to really build up the product. The colour is also good and does last well. My only down fall was that I found it smudged more than my normal gel liner. I think if you don't have time to faf around with gel liner and the brush or you want to have something to throw in your bag for a night out, this product is really good.

They chubby style means its easy to hold and not too fiddly. This means that you can get a very smooth finish to your liner.

So all in all, would I buy this product again? Yes I think I would! The pros far out way the one issue I had. I would be interested to see if they also do this product in any other colours...

DLJ
Xoxo

Sunday 4 October 2015

MUA Cosmetics A/W Collection : Velvet Lip Lacquer and Metallic Liquid Lips (SWATCHES)

A few weeks ago I won a little selection of th MUA Cosmetics A/W collection. Unfortunately (we'll sort of unfortunately) I was away when my parcel was delivered, so I had to wait a few weeks to open up my prize. But I can honestly say that it was so worth the wait!

You may have already seen my YouTube video ( http://youtu.be/lxuDu18PK9k ) but I wanted to pull together a little blog with some swatches for you! I wanted to first start by looking at the Metallic Liquid Lips and the Velvet Lip Lacquer. 

The Metallic Liquid Lips, as you may guess from their name, have a more metallic look to them. They are quite shimmery and the darker shades have a more obvious glitter in the formula. 

The Velvet Lip Lacquer on the other hand is quite the opposite. These glosses dry matte after a few seconds and are more a lip stain to be honest. They last a long time and even hold up pretty well against food and drink. 

So who wants to see some swatches!? Let's start with the Metallic Liquid Lips! 


Colours from left to right :
Twinkle
Glint
Blaze
Bedazzle
Flash
Flare
Luster


Packaging 


Velvet Lip Lacquer 


Colours from left to right :
Potency
Symphonic
Vivacity
Zest
Tranquility


Packaging 


First Impressions

Metallic Liquid Lips - The formula is also quite 'wet' so you really have to build up the product with this so get a nice opaque colour. The glitter is a nightmare to get off. Some may say this is good because it lasts longer, but I find it's a little too much. However, they do look really pretty on and that is their main purpose! They do smell really good though and I found that after wearing them my lips felt really smooth and soft. 

Velvet Lip Lacquers - I have used some of the Velvet Lip Lacquers in the past and the formula dried out really quickly and made your lips feel really dry. They have updated the formula on these new shades are they are really nice. They don't flake like the old ones did and they are much smoother. They have reignited my love for these products. 

I think the packaging on both of these products is really pretty, but my favourite is the Metallic Liquid Lips. It's quite different to most other lip glosses and just stands out nicely. 

You can buy these products directly from MUA Cosmetics (http://www.muastore.co.uk) or you can buy them from SuperDrug (www.superdrug.com)

Metallic Liquid Lips RRP £4 
Velvet Lip Lacquers RRP £3

At those prices, I suggest you grab a hand full and head to your nearest till!

DLJ
Xoxo 


Monday 21 September 2015

Benefit Dream Screen

I'm pretty sure this mini sample appeared in one of my BirchBox's recently but I can't quite remember which one. Either way, thats irrelevant haha. What you really want to know is my thoughts on the product (well at least I would assume that is why you are here!)

So here goes...


I had been saving this little sample to use while on my honeymoon in the Maldives. The Dream Screen offers SPF 45 PA +++ Sunscreen for your face. FYI, SPF stands for 'Sun Protection Factor', this indicates the level of protection from UVB rays.  While PA indicates the level of protection from UVA rays. The more 'plus' signs you have after the PA highlights the more protection you get from your sunscreen. (1)

Now I don't know about you, but where I live in the UK, the chances of needing this type of protection for my face are pretty slim! So rather than try it at home where the sun doesn't seem to shine that much, I thought I would save it and bring it along on my travels.

The first thing for me to mention is that I hate applying sun screen to my face. Not because I don't want to be protected from the sun, but because I am so prone to breakouts. Sunscreen really is a double ended sword for me. Do I risk breakouts but protect my skin from harmful rays, or do I forgo sun protection and attempt to keep my skin spot free?

Let's face it, the last thing anyone wants is to look like a) a lobster or b) an ache prone teen on their holiday snaps! So when I received this little sample, I thought GREAT! I know that Benefit products don't give me break outs and I need to keep my skin safe. The Maldives is right on the equator, so even when it doesn't look sunny, your skin is still at risk of being damaged.

At the age of 24, my skin is still pretty up and down when it comes to spots. I try to have a good skin care regime to keep my spots at bay, but what can I say, no amount of skin care can keep hormonal ache at bay :(

While on honeymoon, my skin was starting to look pretty good. The warm weather and lack of make up seemed to be doing it's trick at helping my skin look young and spot free.

So what happened what I applied the Benefit Dream Screen? Nothing...well in terms of spots at least ;) My skin was left looking and feeling very soft and smooth and even quite matte!

The formula is quite thin and glides on really nicely. If anything, this is more like a face cream than a sun screen. REJOICE spot prone friends! Someone has finally come out with a sunscreen that doesn't make you feel greasy, yuckie and leave you worrying about whats being absorbed into your pores all day.

The light weight texture means that you can leave your room feeling fresh, oil free and most importantly protected from the sun. And what about the smell? Unlike most sunscreens, the smell of Dream Screen is not over powering at all. It smells beautifully fresh and light.

And it's protecting ability? I have been in and out of the water snorkeling and have been in the sun most of the day and have not had any issues at all. I have been applying a thin layer once or twice a day, depending on how much I am in and out of the water. This would also depend on where you are in the world and how much exposure you are getting.

Price

You can pick up a 45ml bottle of this for just £25.00. I really do think this is a great price. I know what your average sun screen can be a lot cheaper, but when it comes to your skin and specifically your skin on your face, I don't like to mess around. And for me, having a sun screen that protects and doesn't make me break out, is worth more than £25.00!

(1) http://www.dermatalk.com/blogs/skincare/spf-and-pa-rating-in-sunscreen-what-does-it-indicate/

Sunday 20 September 2015

Eylure : Tweezers and Brow Control and Shape Gel

To me, Eylure were always know for their lashes. However, it appears that as the beauty industry is more and more born focused, so too are Eylure.

Two of the products I have been using from Eylure when it come to brows are their tweezers and brow gel. 


Anyone who is keen to keep their brows in check needs both of these items in their make up bag. But are the Eylure products able to rival the top leading brow products on the market? For me, when it comes to brow 'maintenance' I think of people like Anastasia Beverly Hills (ABH), Tweezerman and Billion Dollar Brows. Being a frond lover of both ABH & Tweezerman products, the Eylure brow range had a lot to live up to.

I will admit, I have not used the ABH brow gel, but I have head lots of good things about this product. I currently use the ABH dip brow pomade, and even without a gel on top, this holds my brows really well. I have on the other hand use Tweezerman tweezers. They are amazing. Nothing more to say there! 

Let's first start with the Eylure Tweezers. 


Unlike most tweezers on the market, these have a brush on the end to help with brow grooming. Having this brush to hand also makes it easier when plucking to make sure that you are maintaining the correct shape. In terms of their usability, I would say that they are pretty good tweezers. I have really pale skin and dark hair, so I find that I need to pluck more often than most because my hairs show through really on. For me, it is important to have tweezers that can get the hairs when they have literally just come through the skin. These tweezers really do seem to do the job. I was really quite impressed! 

The only thing I would say I dislike about these tweeters? The direction of the brow comb. I know that sounds so weird, but honestly, the comb faces downwards so when I am plunking the comb digs into my hand and actually hurts by the time I am done. My advice to Eylure, face the comb the other way! Otherwise, a great product. 


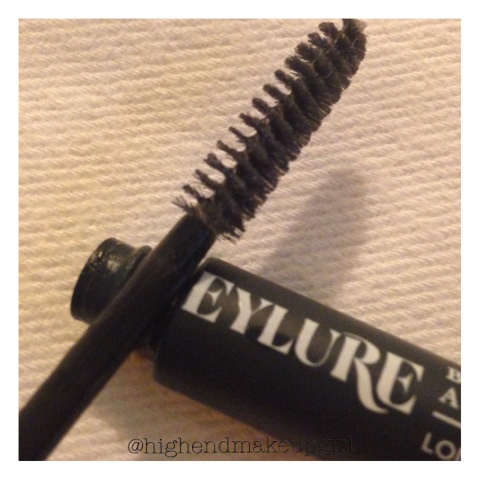
Moving onto the brow gel. Like I mentioned above, I have't used the ABH brow gel myself, but have heard very good things. So onto a brow gel that I have tried and tested on many occasions. The Eylure brow gel does what it say on the tin sort of speak. It does help to control brows and is a shaping gel. 


However, if you need to go back in with brow product, like I sometimes do, I find that you can really easily brush this gel out. When you do this, it almost makes your brows a little 'fluffy'. You know like if you have hair spray in, then you brush it through and your hair becomes a bit puffy and static? This is what happens with this brow gel. But then, maybe its just me that goes back and re-brushes my brows after brow gel application? Anyway, if I have managed to do my brows correctly first time round and I don't need to re-brush after gel application, I find that this gel is okay. It does hold don't get me wrong, but I don't feel like it holds long enough? Again maybe I am expecting too much from my brow gel? Maybe I need to try out some other brows gels next to this one to get a really good feel for what else is out there and what I should be expecting? As it goes, I would buy this brow gel again. It does it's job even though I do feel like it could do it even better? 


Price is always an important factor when it comes to topping up my collection.

Brow Comb Tweezers £12.50 (http://www.eylure.com/brow/brow-comb-tweezers.html)
Brow Control and Shaping Gel £6.25 (http://www.ey
lure.com/brow-control-shape-gel.html)

In comparison 
Tweezermen classic tweezers £20.95 (http://www.johnlewis.com/tweezerman-classic-steel-slant-tweezers/p430889)
ABH Brow Gel£16.50 (http://www.beautybay.com/cosmetics/anastasiabeverlyhills/browgel/clear/?gclid=CjwKEAjwsvmvBRCT5ozK-dmY7D4SJACyIoJmvCuj9xc6a6B5XGcKhROCtAJwTAXklJ1uW0eNT5mKYRoCcJjw_wcB)


As you can see from the above, Eylure are a much more cosh effective solution to brow maintenance. Having used Tweezerman tweezers I would say they are worth every penny. They are steep, don't get me wrong, but if you don't loose your tweezers on a regular basis (come on, it can't just be me?) then they are a very good long term investment!


I would happily re-purcahse both of the Eylure products. I use their tweezers on a daily basis and have not had any issues with them (other than that comb pointing the wrong way!!) And the brow gel does do what it says it will. I would admit, I would like something that will hold longer, but when you look at the price, for just £6.25 a tube, you really can't go wrong! 

I know that most Superdrug stores stock both of the Eylure products I have discussed above, so head down to your local store to pick up some brow bargains!!

DLJ
Xoxo 


Friday 11 September 2015

Travelling long haul? Here's my hand luggage essentials.

Travelling long haul? Here is my bag of essentials that I travel with when going anywhere over a few hours. 


First of all, the make up bag. As I'm sure you all know, you need to have your liquids in a see through bag to get through security. This Harvey Nichols make up bag is perfect for this. Not only does it looks super cute, it is still pretty see through when filled with your make up goodies. 

Face 

For me, when I'm travelling long haul, the two most important things are face wash and moisturiser. Still on a plane for a long period of time without 'fresh' air is not great for your skin. And when I go long haul I normally like to catch a few hours sleep. I wouldn't sleep at home with my make up on, so I wouldn't sleep anywhere else with it on, especially a plane. I use the Shu Uemura Cleansing Oil for make up removal at home, so I packed a mini sample size to make sure I could have nice clean skin before applying my moisturiser. Which leads me onto my next must have. Creme De La Mer. Hydration is so important when flying. The recycled air on the plane can really dry your skin out, do I used my Soft Cream to keep my skin looking healthy. You can pick up these minis when you are getting your normal size products. I always like to keep them for then I am travelling. 

Around an hour before landing, I like to top up on a bit of make up so that I look reasonably human when I land. My Boots Foundation is the perfect size for my travel bag, so in it goes along with my Sigma Kabuki brush. I also added my ABH dipbrow pomade and Morphe brush to fill in my brows before I land as they just don't look right otherwise. I don't do them as well as normal, just filling in the patchy bits ;) 

I also added some Benefit Benetint and a lip colour from .... to add a little bit of colour. 

I've also got a spare brush from RealTechniques and a little sample of They're Real Remover just encase! You never know.


Hair 

Although my hair will be a little greasy, I put it up out of the way as soon as I get on the plane to try and eliminate as much grease as possible from my face transferring to my hair. But I've added my little BirchBix hair brush which was new in this months box. Perfect timing for my holiday! It also matches my make up bag hehe. 


So that's my long haul essentials make up bag. I will admit I forgot to put some mascara in, but found it wasn't really an issue. 

DLJ 

Xoxo

P.S. I was travelling from the UK to Hong Kong if anyone wants to know! Around a 12 hour flight 


Sunday 23 August 2015

Rituals Fortune Scrub Review

Sweet Orange and Cedar doesn't half smell good first thing in the morning. Although this scrub is only meant to be used once or twice a week, I found myself using it more because it smells SO good. And to be honest, it's gentle enough to use at least 4 times a week.


This tester size arrived at the perfect time for me this month. I was due to be having a fake tan a few days before my wedding and wanted to make sure that my skin was fully prepped to avoid any patchy marks. I used this for 3 or 4 days on the trot on the lead up to my fake tan and found that my tan was flawless. I have had a few spray tans in my life and I have never had such an even look and I put this down to the use of the Rituals Scrub.


Saying that, I also found that when it was time to get rid of any left over spray tan, the citrus combined with scrub also worked a treat.

Spray tanning stories aside, I'm sure you want to know a little more about this scrub other than the fact that it's great for spray tan prep and removal!

I touched on the smell of this scrub at the beginning and my oh my does it smells A-MAZING. I'd buy this scrub again just purely based on its smell. It is so fresh and sweet but not sickly at all. It leaves your skin with a subtle scent and feeling so smooth.

On application, the formula is almost like a gel which turns into a foaming exfoliating cream when it is mixed with water.

You can buy the scrub directly from Rituals for £10 for a 150ml bottle. Which I think is a great price. The once I received in my BirchBox is 70ml and although I have used it a lot, seems to have loads left.

Why I buy this? Yes! It smells great, leaves my skin feeling soft and goes a long way.


DLJ
Xoxo